11 caulking tips and tricks to make sure you get a professional finish
Caulking like a professional needs a consistent pressure when applying(Image credit: Getty Images)
Caulking is an art that isn’t that difficult to master. Once you know how, you can start tackling DIY projects with confidence. Smooth lines, sharp shapes, and a watertight finish will become everyday.
Whether it’s silicone vs caulk, the application and finishing process is the same. You will need a caulking gun and your chosen sealant. Make sure you have a waterproof silicone for bathroom projects, and decorators’ or painters’ caulk for paint projects.
Here you’ll find the answers to your common caulking questions, so you’ll be finishing like a pro in no time at all
1. Remove old caulking before replacing with new
You can’t place new caulk on top of old caulk, especially if it is in poor condition. So to get the best finish you need to remove the old caulk. For example, if you are caulking skirting boards you can use a Stanley knife – cut as close to the edges as possible and pull out.
But a safer option is to invest in a specialist caulk removal tool. These can run under the caulk and pull up for a clean removal. These are often found in a caulk/sealant finishing kit.
You will need to remove old caulk before putting new caulk in (Image credit: Getty Images)
2. Clean your surface before caulking
Before you even think about adding any caulk or sealant to a surface you need to make sure that it is clean. If there is dust, dirt, debris or old caulk in the area to be used, the caulk will not adhere as well as a clean, debris free surface.
Sweep and vacuum to get rid of dust, dirt and debris. But if the surface is greasy or has soap scum on it – typically a kitchen or bathroom – this will need cleaning off. You can use surgical spirit and a clean cloth for a quick clean.
Alternatively, dip a cloth or scourer in a solution of sugar soap. What is sugar soap you ask? A mild but powerful detergent. Once cleaned, rinse with warm, clean water and dry the area with a dry cloth or old towel.
3. Consider investing in a decent caulk gun
When it comes to choosing a caulking gun, the size of the project can affect what you buy, says Mark Irving, building expert at Build & Plumb. “When undertaking a small project, a small and more affordable caulking gun may suffice, especially if you don’t plan on using it often.” Cheaper caulking guns typically have skinny cradles and less robust handles, but are still good for occasional jobs.
But if you are working on a larger project or are a regular user, Irving says, “It’s best to invest in a high-quality and long-lasting caulking gun. This may involve picking a battery-powered or electric caulking gun for ease of use or choosing a caulking gun that is moveable and has good hold to ensure maximum comfort.”
If you’re an occasional caulker, an inexpensive caulking gun is perfectly adequate. But if you are a regular caulker, invest in a better caulk gun. (Image credit: Getty Images)
Try these caulking tools on your next DIY project
Amazon Basics Heavy Duty Caulking Gun
Made of durable powder-coated metal this heavy duty caulk gun includes a silencing mechanism and ergonomic rubber-coated handles for extra comfort.
Lil Pecker Caulk Saver Sealer Caps
These heavy-duty reusable caps are perfect for keeping your caulk fresh and ready to use again. They slide on to create an airtight seal and you get 25 in a pack.
Soudal Decorator Caulk Gap & Crack Filler
This decorators caulk is ideal for indoor areas that need a flexible filling such as skirting boards that need to be painted after being applied. Comes as a pack of two.
4. Choose the right caulk or silicone for the job
For most indoors jobs, it is a toss up between decorators caulk and silicone sealant. Both have very similar properties, but decorators’ caulks will be used for sealing small gaps around doors, windows and skirting. It acts like a flexible filler and can be painted.
A sealant will be used for jobs like siliconing a shower as it is waterproof and stays more flexible. An important factor for areas that need movement but also need to stay watertight like a bath. For exterior jobs, use a specialist exterior caulk or sealant.
Whether you choose caulk or silicone is dependent on the job (Image credit: Future/Steven Jenkins)
5. Snip the tip at an angle and start small
Cut the tip at an angle, as this makes it easier to apply to whatever surface you are working with. How far down the nozzle you cut determines the size of the bead. The further down, the larger the flow of caulk or sealant will be.
Irving says, “To achieve an even flow of caulk, it’s best to cut the tip of the caulk tube at a 45-degree angle and insert a clean wire into the tip to break the inner seal.”
As a general rule, start small, around 6-8 mm for a small bead. Test and snip again if needed. Use a Stanley knife to cut the tip of the nozzle away from your body and hands.
6. Get crisp, clean edges with tape
Irving says, “It can be helpful to tape either side, above and below, where you want to apply the caulk.” This is especially helpful if you’re a novice at applying caulk/silicone. We suggest you use a blue painters tape like this Scotch ScotchBlue Original Multi-Surface Painter’s Tape from Amazon. He adds, “This will help to keep the caulk neat and offer a guide to follow when applying the caulk.
Place a length of masking tape on either side of the area where the caulk/silicone will go. Irvings suggests, “It’s best to keep a gap of around 5mm between the tape.”
Using tape will give you smart, crisp edges (Image credit: Getty Images)
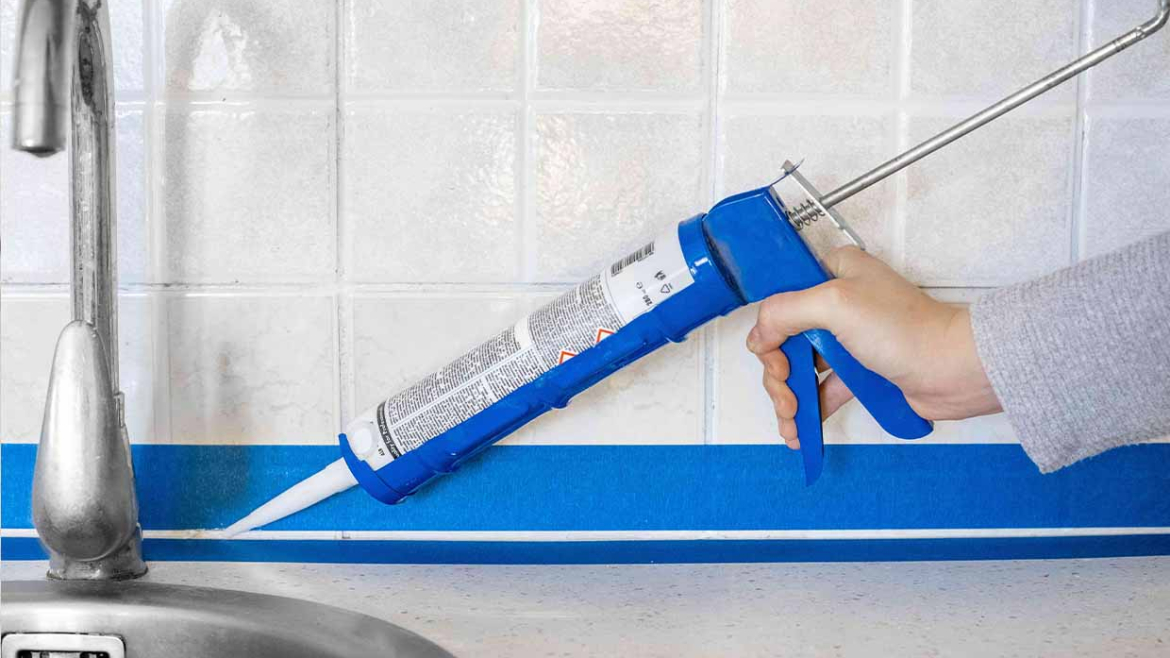
7. Use even speed and pressure
To get an even run of caulk, you need to use a consistent speed and consistent pressure. Irving says, “Make sure to use a 45-degree angle and maintain the same force when squeezing the caulking gun to ensure an even caulk bead.”
Start in a corner, squeeze the handle and as soon as the caulk comes out, start moving. Not too fast otherwise you will get a thin, stringy bead, and not too slow so you get a lumpy, thick bead. Irving adds, “When moving the caulk gun across the joint, keep a slow pace and ensure that you don’t change speed at any point.
Try keeping your arms at the same angle and moving your body rather than your arms to get a consistent bead of caulk. If you are not sure about the process, then practice.
8. Practice, practice, practice
If you are new or a novice to the art of applying caulk or sealant, it is a good idea to take a few practice runs before jumping straight in. Get a piece of wood or cardboard – something you can throw away – and run a line along it.
Keep doing this until you get a consistent and even flow and are confident to carry on. This shouldn’t take long, but it’s definitely worth the time. If you are going to tile a kitchen wall or similar make sure to start in an out of way area – just in case it doesn’t go quite to plan.
9. Finish with a caulking kit
Once you have added your caulk or sealant it needs to be finished to get the best seal and look. A lot of pros simply suggest using a wet finger to quickly get the job done. Make sure you have a cloth on hand to wipe off the excess.
Another option is to use a damp sponge – more hygienic. But if you want a real smooth finish or a different shape or size then use a caulk finishing kit. This will help ensure that you get a uniform professional looking finish. But don’t forget to finish the caulk within 5-10 minutes as the caulk only stays workable for around 15-20 minutes.
Caulking kits can give a professional finish (Image credit: Future/Steven Jenkins)
10. Cap your caulk ready for the next job
When you finish a job there’s a good chance that you will still have some of your best caulk or best bathroom sealant left in the tube. To stop the caulk drying out and causing a blockage push an appropriately sized nail down the nozzle and wrap masking tape around the nozzle and tip.
Alternatively, wrap the nozzle in plastic wrap/cling film and then secure with masking tape or painters tape. If you have nothing to hand squeeze out a blob of caulk or sealant let it dry a little, lick fingers and roll into a ball. Place the ball on top of the nozzle.
If the caulk does dry in the nozzle use a screw to help pull it out. Screw it in and then pull out.
11. Invest in new nozzles
You can buy caulk tubes without nozzles as well as with nozzles. Replacement nozzles are inexpensive and always handy to have. If you leave a nozzle lying around for a while it may split and need replacing. Many nozzles come with covers to stop them being blocked with dry caulk.
Caulk is a tool that should be in every DIYer’s toolkit. You can use it for caulking windows and many other projects. Check out our guides on how to use decorators caulk and painting caulk to get a great finish on paint projects.


Leave a reply